|
The Building Of A Candu E-Z, "June's Putt Putt"Dan and June Boucher of Rochester, New Hampshire, purchased plans for their Candu E-Z in April 2007. They had a catboat, and sold it finally in October 2007. On October 30, 2007, Dan had his load of plywood delivered! Dan has graciously agreed to let all of us watch his building process. The new boat will be christened "June's Putt Putt". Dan is also going to keep track of his expenses so that we have a working knowledge of how much it costs to build this boat in today's market. The last pricing that Berk did was in 1999 and as you know, costs have risen. We have done estimates of the current pricing, to the best of our knowledge, but Dan will be able to let us know a more exact figure now, which will be helpful for all of us. We hope that you find these pages interesting, helpful and entertaining. Dan has a great sense of humor and he has an analytical mind. This should be a great experience for everyone! Good luck, Dan!
Dan and June have chosen their logo and had sweatshirts made to celebrate their new boat! The excitement begins!
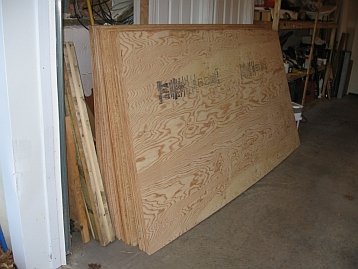
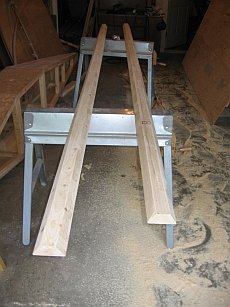
Today, October 30th, 2007, the lumber arrived!
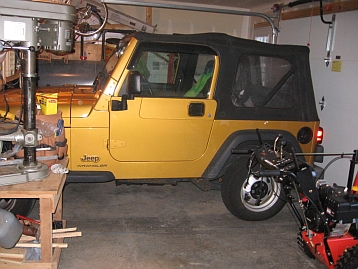
Dan will be sharing the bay while he works on this project with June's Jeep Liberty, so we know that the working area will be cleaned up daily!
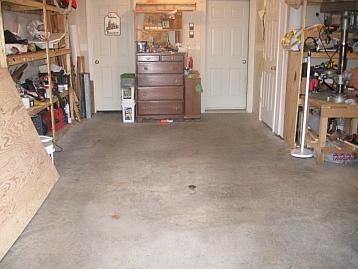
Here is the actual working space where "June's Putt Putt" will come to life! Hold on to your hats! Away we go!
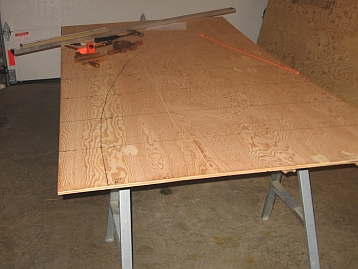
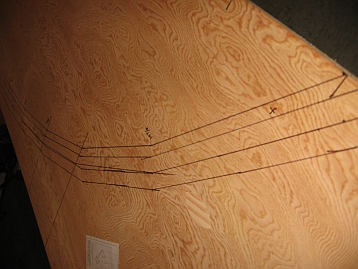
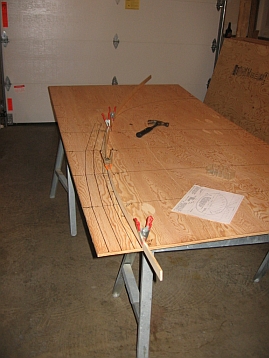
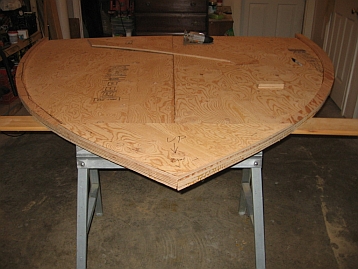
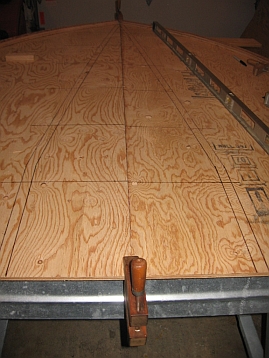
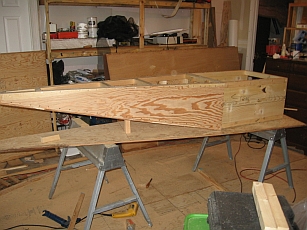
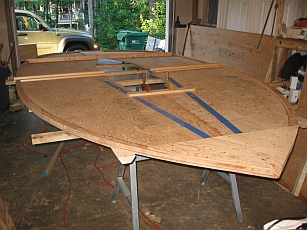
Today's progress in pictures...See Below! 1) Stern section. Used a square to start the layout lines and the long level to connect them, I clamped the level for each line so it wouldn't move on me. A new Sharpie was used to mark the lines. The orange string was used to draw the stern curve. I went back and added the chine log, except for the stern which I will use the cut out stern to trace.
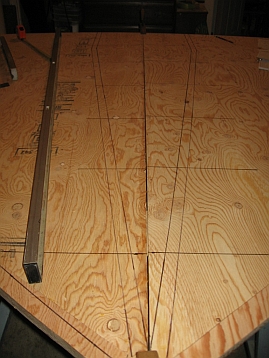
2) Bow section. No curve to the lines yet as I don't have anything flexible enough yet. The other set of lines outside the bottom are the chine logs. When I start to cut I will cut 2 pieces at a time so they will match. Dan
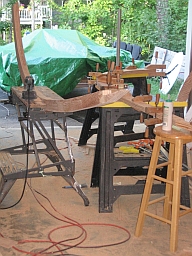
11/5/07 Above you will see the new fairing stick being put to good use. Results were a beautifull curved line. (Will get bow section pictures tomorrow.)
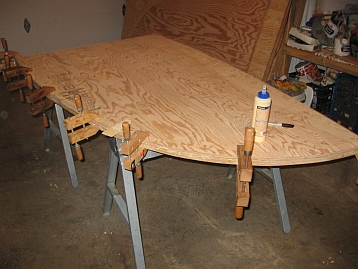
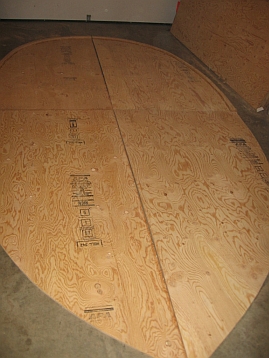
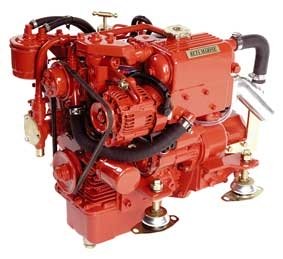
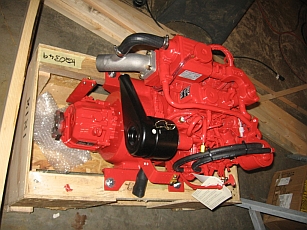
1. Chine log on port stern section. From past experience with fiberglass, you can't glue anything to it so the chine logs are going on now. 2. Bottom placed together. 3. Big day for Putt-Putt! She is going to be powered by a Beta Marine 10 HP Diesel. Sent the deposit to hold an engine at today's prices for spring delivery Stern shot.
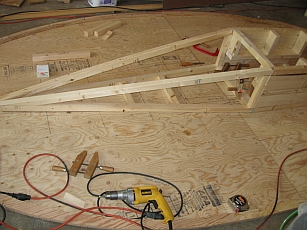
12/1/07 Dan is progressing along nicely! The following photos will show his work this week on "June's Putt Putt": 1.Bow gussets cut out. 2. With the bow section set up, I laid out the new keel frame. Frame members will be 1" x 2" (full thickness). The forward 15" of the engine compartment is laid out and will be 20" inside the frames. Not drawn in yet are the cross pieces. 3. From the bow back. Haven't gotten beyound this point in the keel design.
May 21, 2008 Well, after a snow-filled winter finally turned to thaw, Dan is back at work on the "June's Putt Putt" once more. Here is the beginning of the new log:
"Notes on shop equipment: I have a 24 year old Shopsmith Mark V. Has been used for lots of boat projects. Never enough clamps as I found out gluing up the mast. (Side project I started while waiting to get the Beta 10.) Have a DeWalt drill that is more than enough to do the drilling. Also a Freud sabre saw that works beautifully. Make nice straight cuts so a lot of "freehand" angles have been cut with it."
The following photos are of the frame members, the keel standing up, and the keel attached. Dan says "Finished front section standing on end. Holds my weight and I am no light weight!" Also another note:
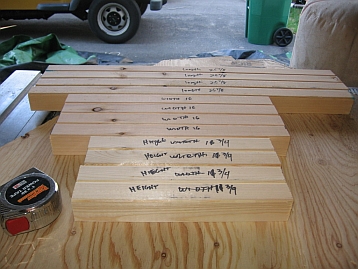
"Frame members: The front 8 were not used. The middle 4 were redone to 18 inches. Let over stock will go into keel bracing."
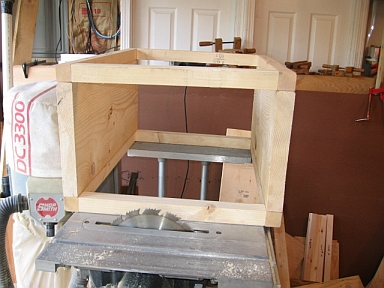
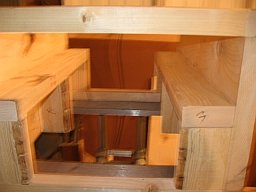
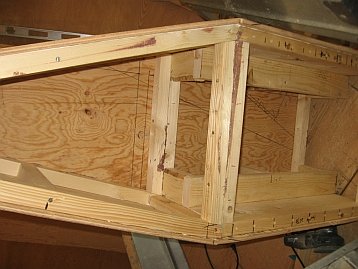
"The engine "compartment" is completed. Dimensions 27 in long by 21 in wide by 14 1/4 in high. Structual members are 2 x 4 fir ripped in half and then to length. Sides are a 1 x 12 (11 1/4 actual) and the engine beds are 2 X 4 fir as well. Took 3 2 x 4's to get the frame members. I "wasted" the width and height members as the width pieces were an inch short due to the oil dip stick on the engine would not clear at 20 inches wide. At 21 inches wide it now clears. All supports are 2 x 4 screwed into place. Used 97 3 inch #10 SS wood screws to put it together. I don't want it to come apart. This weekend after cleaning the garage bay I will work on the rest of the keel members and cut out the 1/2 plywood to cover it with." The following photos are of: the engine box frame and the completed engine compartment. Dan's notes: "Engine beds with supports. Center supports are screwed into the sides and bed. This will be covered in 1/2 plywood then fiberglassed".
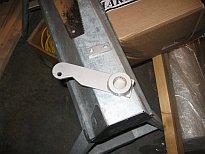
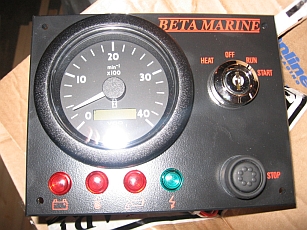
The following three photos: "Sound Marine Diesel LLC also machined my rudder post and associated parts shown here. This is a shot of the control panel. RPM/Hour guage, key for starting and warning lights along the bottom. June and I picked up the Beta 10 on May 11, 2008!"
June 2, 2008 Dan made a lot of progress since his last posting. Here are 5 of his latest photos for us.
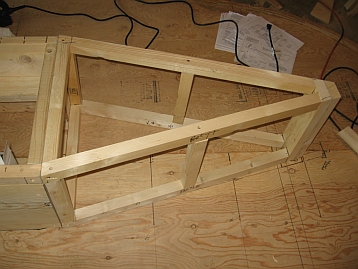
"Here is the progress for the week, mostly this long weekend. Have a friend that sprays in bedliners and I might have him do the inside, save me from fberglassing it and his liners are waterprof. Picked up a power planer which works real well. Got one of the rear sections beveled and it went easier then using the Shopsmith to sand the bevels. Dan" Photo 1: Engine compartment with the semi completed front section. (Mistake in putting the plywood on at that stage.) Photo 2: Frame work for the aft section. Stern post is from left over 2 x 12 from the engine compartment. Photo 3: Completed rear section and engine compartment. Red lines are the overlap so that I nailed inside of that. Only missed on 2 nails out of over 1000 so far. Photo 4: Looking forward. Had a tube of brown adhesive left over from the catboat so used that along with the 3M 5200 (white adhesive). Photo 5: Completed keel with "nose cap". Used a CD to get curve. Still need to round over edges, but need to fill the bow section and I don't have any bondo and the stores are closed today. The joint between the front and rear sections didn't meet very well and I had a bear of a time getting screws into the frame due to the plywood being on. The white is 5200 filing the gap. Note for future builders of a "deep" keel version: Build the frame together then put on plywood. (Came out okay anyway. FRP will cover it up.
7-10-08 Side keels ready for fitting.
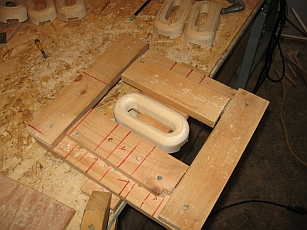
Jig for Hawse Pipes. Used to route inside and out.
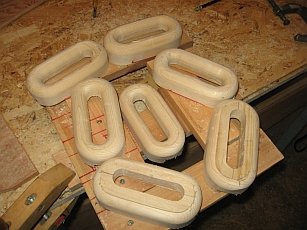
I made up 7 all for the outside. - 1 spare if needed. Have backing plates ready as well. After they were routed out I sanded the ridges off. Still need to cut to depth once done with the angles on the Shopsmith
7-15 Here is the stern section-clamped to the keel. The aft bulkhead beam was moved forward 3 inches to fit in the fuel tank.
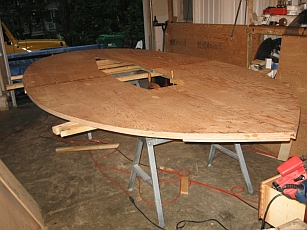
Here is the front and stern sections butted together. Built a frame to sit it on to work on and once together to do the frp work on. Side keel sticking out for now, have to put in position and the cut and attach. 'Blue' tape marks edge of keel. Thought long and hard about what method to use to build the bottom. Figured bow and stern section would be easier, but it wont turn over inside the garage. Have to take outside to flip and is easier with 2 people
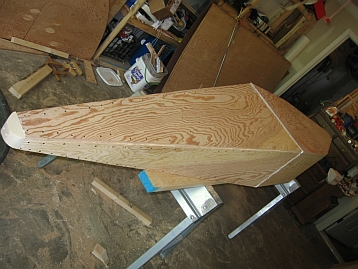
7-18-08 Susie, Big day for June's Putt Putt! The bottom is together! Its out in the garage drying - the final joint connecting the front to the back. The front of the joint has 1 inch ss screws while the back is using 2 inch into the thicker beam. Dan
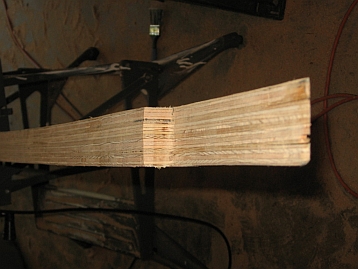
Set up for the rub rails. 3rd layer on the one clamped up. I let it set up 24 hours to get a strong joint. 8/27/08
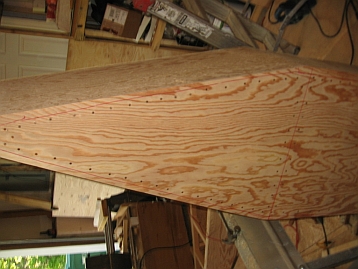
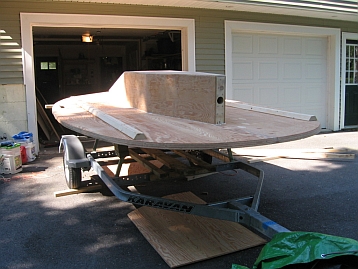
The following 3 photos are of the June's Putt Putt's hull upside down on her trailer. Great work, Dan!
Dan's Trolling Motor SpeedsThe following are trolling motor speeds that Dan has given us to work with....I am sorry, he did this on an Excel sheet, but I am having trouble getting it into the proper text format for the website. However, you WILL be able to see what he is telling us!
TROLLING MOTOR SPEEDS SETTING AMPS/THRUST BATT/AMP DISPLACEMENT W/LINE LENGTH Weight Change only the Red Values 5 55 70 1765 15.4 1125 boat 4 40 300 crew 3 27.5 100 bat/bat/Trol 2 20 15 anchor 1 10 50 electronics Efficiency 0.95 50 cooler/loaded Battery allocation amount 0.70 50 gear 75 rig LBS OF THRUST - --#5-- 55 LBS LBS OF THRUST --#4-- 40 LBS 1765 WATTS CONVERSION 12.8 WATTS CONVERSION 12.8 EFFICIENCY 0.95 EFFICIENCY 0.95 1 HP 768 WATTS 1 HP 768 WATTS BATTERY 70 AMPS BATTERY 70 AMPS HP GENERATED 0.87 HP GENERATED 0.63 DISPLACEMENT (LOADED) 1765 LBS DISPLACEMENT (LOADED) 1765 LBS WATERLINE LENGTH 15.4 WATERLINE LENGTH 15.4 CUBED ROOT OF DISP/HP 12.623 CUBED ROOT OF DISP/HP 14.072 SPEED TO LENGTH RATIO 0.844084 SPEED TO LENGTH RATIO 0.757171 PERFORMANCE 3.31 KNOTS PERFORMANCE 3.0 KNOTS 55 THRUST 3.5 ST.MILES 40 THRUST 4.3 ST.MILES USUABLE TIME 0.9 HOURS USUABLE TIME 1.2 HOURS LBS OF THRUST --#3-- 27.5 LBS LBS OF THRUST --#2-- 20 LBS WATTS CONVERSION 12.8 WATTS CONVERSION 12.8 EFFICIENCY 0.95 EFFICIENCY 0.95 1 HP 768 WATTS 1 HP 768 WATTS BATTERY 70 AMPS BATTERY 70 AMPS HP GENERATED 0.44 HP GENERATED 0.32 GAS DISPLACEMENT (LOADED) 1765 LBS DISPLACEMENT (LOADED) 1765 LBS WATERLINE LENGTH 15.4 WATERLINE LENGTH 15.4 CUBED ROOT OF DISP/HP 15.944 CUBED ROOT OF DISP/HP 17.730 SPEED TO LENGTH RATIO 0.66827 SPEED TO LENGTH RATIO 0.600969 PERFORMANCE 2.6 KNOTS PERFORMANCE 2.4 KNOTS 27.5 THRUST 5.5 ST.MILES 20 THRUST 6.8 ST.MILES USUABLE TIME 1.8 HOURS USUABLE TIME 2.5 HOURS LBS OF THRUST --#1-- 10 LBS WATTS CONVERSION 12.8 EFFICIENCY 0.95 1 HP 768 WATTS BATTERY 70 AMPS HP GENERATED 0.16 DISPLACEMENT (LOADED) 1765 LBS WATERLINE LENGTH 15.4 CUBED ROOT OF DISP/HP 22.338 SPEED TO LENGTH RATIO 0.47699 PERFORMANCE 1.9 KNOTS 10 THRUST 10.7 ST.MILES USUABLE TIME 4.9 HOURS
FACTOR 119 14161 HULL SP 5.26 27.65224 HP NEEDED TO ACHIEVE HULL SPEED 3.45 D/L 215.74 S/L 1.55 HULL SPEED MAX THEROICTAL 6.09 Hull Speed (classical) Knots 5.26
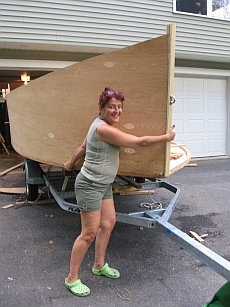
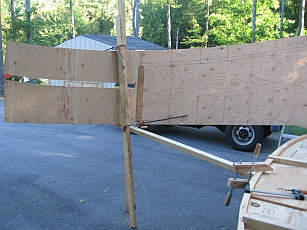
9/8/08 (RE: 2 PHOTOS ABOVE) Got the bottom home just now and now I can start some serious construction. Almost didn't happen! Got a call yesterday around 10:30 from David my friend that is doing the bed liner. He had just started to spray the bottom and it was bubbling up! I went right over and he was peeling off what he had just put on! He had no problems doing the inside of the keel and it is all the same materials. Found out he had a liquid his rep had told him would make the bed liner stick even better to wood so he tried it on the bottom. Because of the humidity it never soaked in and caused a chemical reaction with the liner. David also said it didn't feel right compared to all the other wood he sprayed. We spent a couple hours sanding off the liner and the chemical (you could see where it turned the plywood white). After all the sanding he resprayed the seems and the kept right on going. Was perfect! No problems at all and he won't be using the 'stick' liguid on wood again. Also since he has never used the nuetralizer to eliminate the black color the bouat will be done in black and we will paint over it. Dan 9/13/08 One side in place. Out of nails and 5200 so the other side will wait for resupply. June did help on the bit so she got to be in the picture. Tried all morning to do it by myself, but I couldn't control 12 feet of plywood. 9/20/08 Last week I tried to put the starboard hull panel on and couldn't handle 12 feet of plywood, so I had to wait for June to get home to help.This week at work I was explaining how dificult it wasand had a thought. Why not use a 8 foot 2x3 in place of June! Here it is! Actually took 4 2x3's, a rope and 4 clamps. Here is the back side. The 2x3 in front keeps the plywood vertical and the rope keeps the 2x3's from moving when I pull on the panel.(Trial and error the figure that one out!)
|
